How to install WordPress (Simple Steps)
In this simple tutorial, we are going to see how to install WordPress. We are going to use two methods. First we are going to install it through One-Click simple solution which is mostly provided by today’s modern hosting companies. Secondly, we are going to install it manually.
Here is an overview of what we are going to cover in this article.
Let’s begin How to install WordPress
Before we begin, let’s quickly have a look at brief intro of what is WordPress?
What is WordPress?
WordPress is an open source (free) online publishing tool which enables us to create any kind of websites. Starting from personal blogs, business website, and to a fully functional complex website. You can learn more about WordPress from their official website.
Some of the common websites we can create with WordPress are:
- Business Website
- eCommerce Store
- Personal Blog
- Portfolio
- Resume etc.
There is another online platform called wordpress.com which is different from what we are going to use. Technically they are the same kind of tools, but wordpress.com provides a ready-made online website using their own domain and hosting such as yourwebsite.wordpress.com.
We are going to use the tool provided by wordpress.org which allows us to host their files anywhere we want. Now let’s jump to the installation process. Using these two methods, we are going to install WordPress online in cPanel, which is mostly available.
How to install WordPress (One-Click)
Method 1: Install WordPress using one-click easy solution.
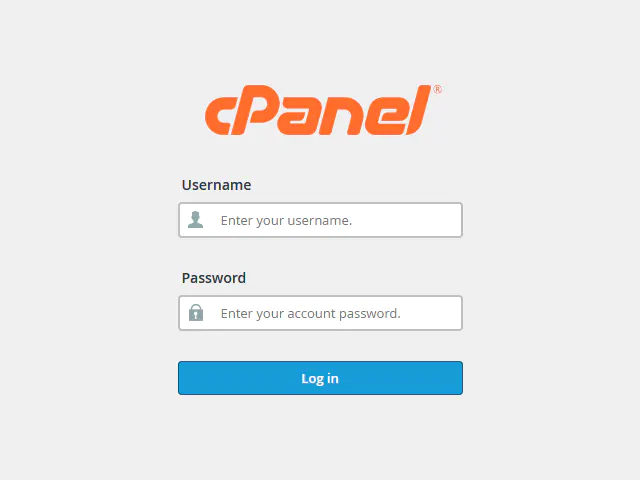
Step 1: log in to cPanel
Let’s log in to cPanel using the URL provided by your hosting company. Usually it is website.com/cpanel or website.com:2083
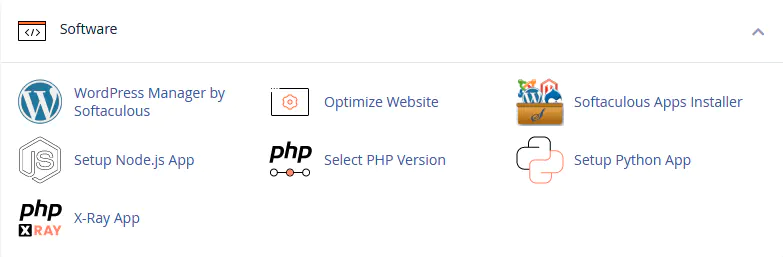
After log in to cPanel, don’t be overwhelmed by so many options. Simply scroll down and search for the group section titled as “Software”. Then, click on “WordPress Manager by Softaculous”. You can also click on “Softaculous Apps Installer” which will allow you to install many other tools other than WordPress.
Step 2: Install WordPress through Softaculous
click “WordPress Manager by Softaculous” for now, and you will be prompted to the next page.
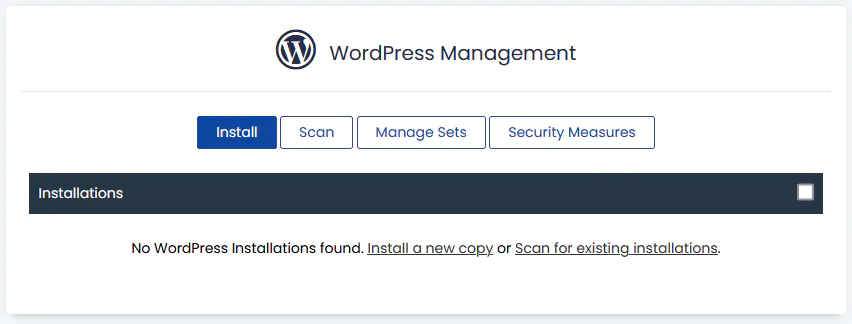
It will show you a list of already installed WordPress sites (if there are any) which are previously installed using this software. Let’s click on “Install” or “Install a new copy”.
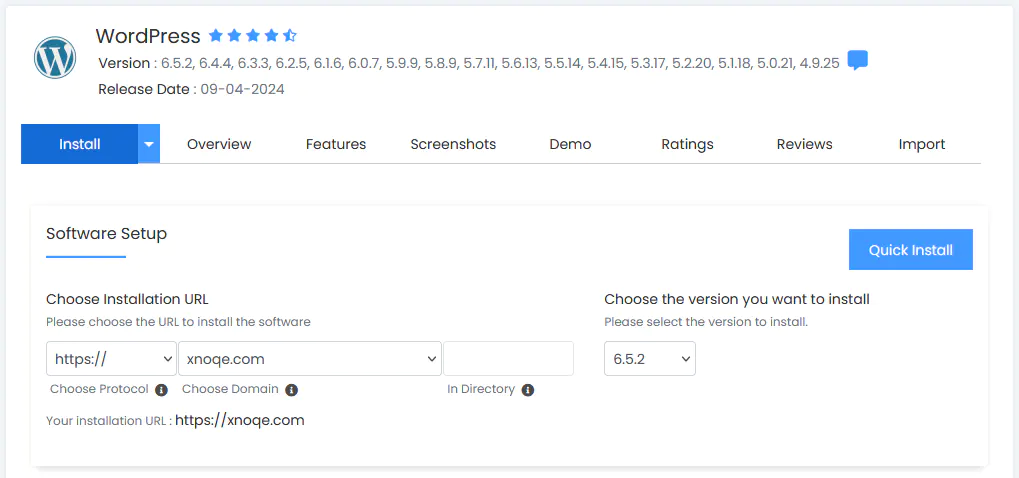
Step 3: Installation settings
Now select the desired location or URL for your new WordPress site. You can either install it on the main location such as xnoqe.com or in a subdirectory such as xnoqe.com/blog. Then select the latest version and move to the next section below.
Disclaimer: Please be very careful while selecting the location of your website. Double check to make sure you are not overriding any existing directory or previously installed WordPress sites.
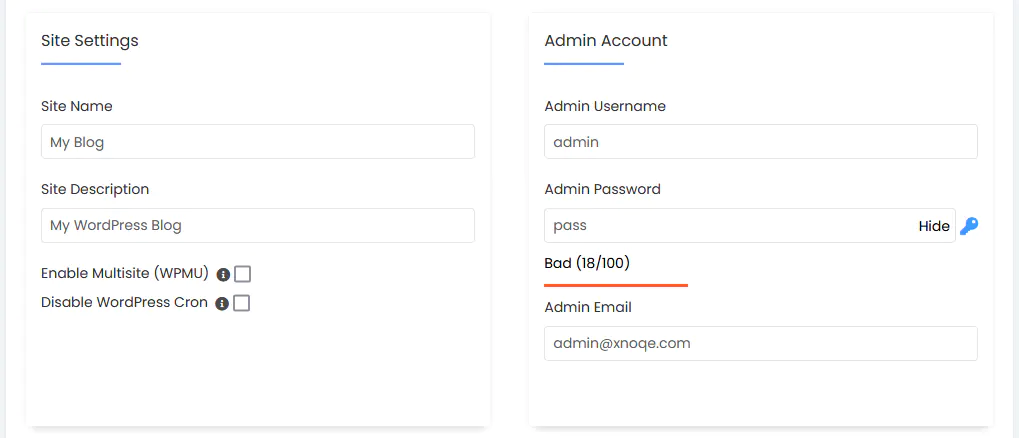
From this section, set the title of your website and create user credentials which you will use to log in to your website after the installation.
BTW, it is not recommended to choose “admin” as username so, select any other username to further improve the security of your website.
That’s enough for now, but feel free to explore further sections below if you want to select any other language than English or want to have any common plugins or themes included with this installation. Then click on “Install” button below. After the WordPress is installed, you can log in to your admin panel or dashboard using this url yourwebsite.com/wp-admin.
Method 2: Install WordPress manually.
How to install WordPress (Manually)
Now we will look at the second method, which is how to install WordPress manually.
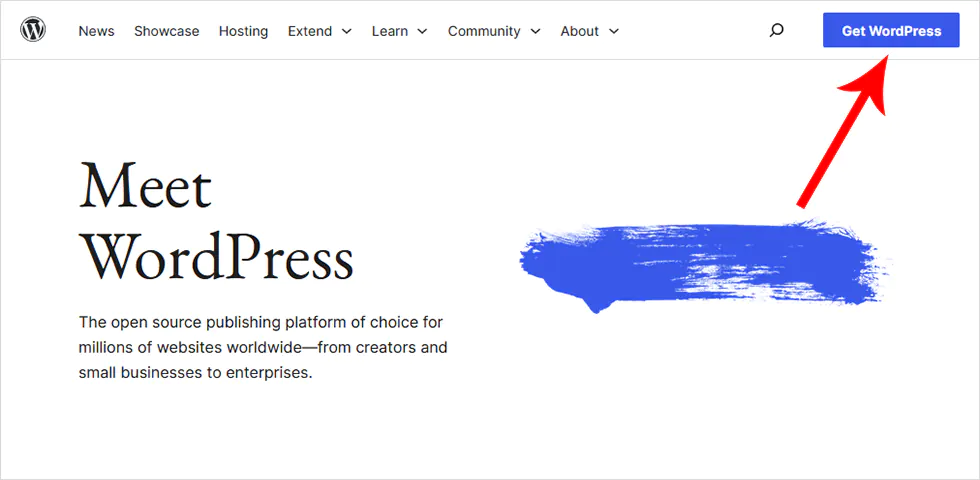
Step 1: Downloading files
To download WordPress files, visit wordpress.org and then click on “Get WordPress” button. Or you can also visit the WordPress download page directly. After downloading, extract all the files and move towards the next step.
Step 2: Creating Database
Log in to your cPanel and search for the section titled as “Database”.
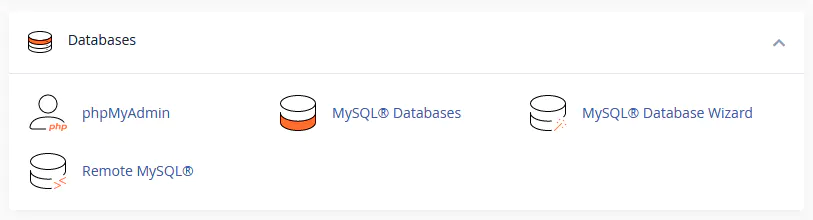
Then click on “MySQL® Databases” and proceed to the second page.
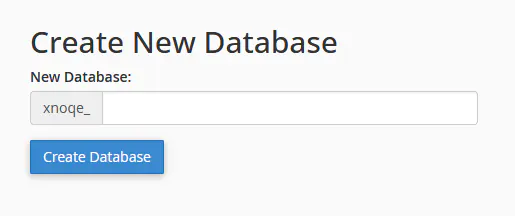
In the manual method, first we need to create a database, a database user, and then assign that user to the database. Enter the database name (“test” in our case) and proceed to the next section below to create a user.

Set a username (“test” in our case) and a strong password which is at least 18 characters in length. Then move to the next section, “Add User To Database”.
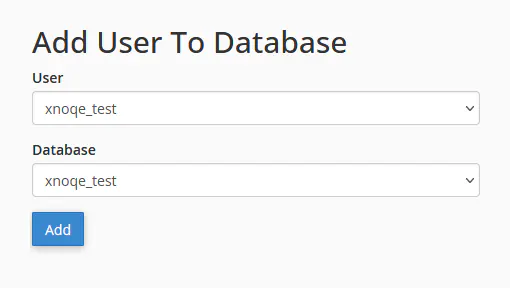
Select the recently created database and user, and then click on Add.
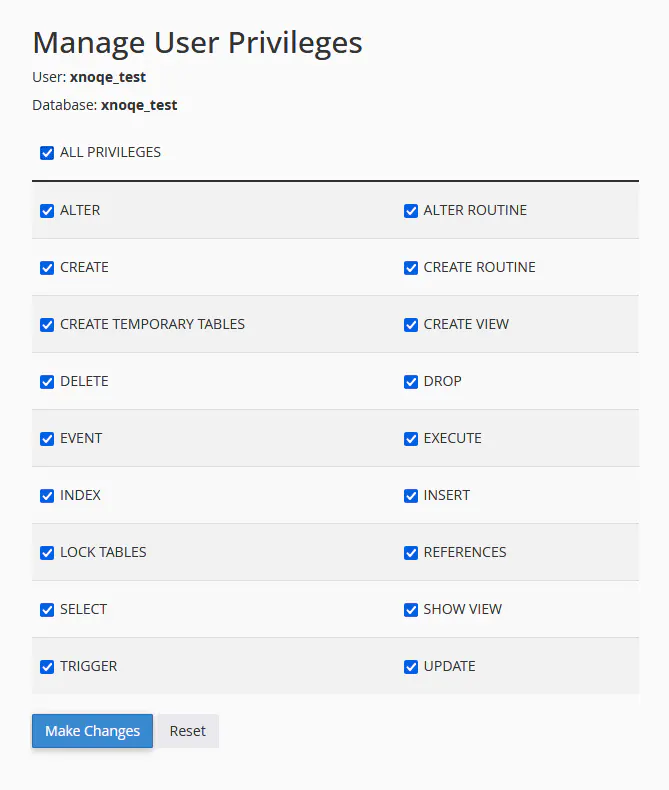
Then click on “ALL PRIVILEGES” and hit “Make Changes”. That’s it for creating the database. You can now go back to the main cPanel dashboard.
Step 3: Uploading files
Now from the main cPanel, look for the section titled as “Files”.
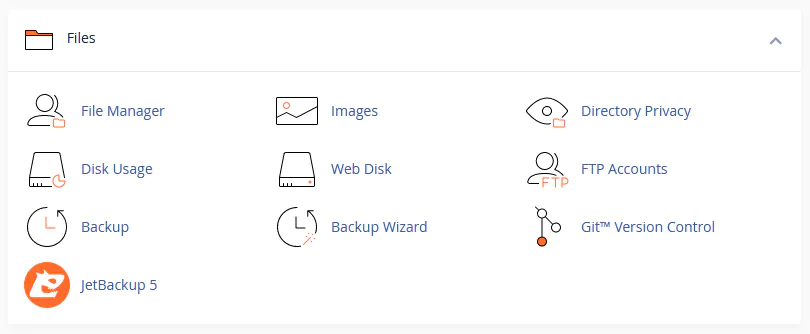
Click on the “File Manager”. Then another page will open, from there you can access files.
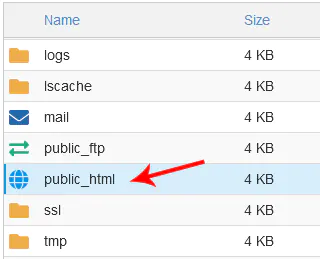
Now navigate to “public_html” or “www” folder. This is the main root directory which hosts all your files visible to the public. You can also create a subdirectory inside “public_html” if you want to install WordPress into a subdirectory (public_html/test in our case) otherwise you can continue uploading files to the main root (public_html) location.
Please don’t mess with any other directory or files unless you know what you are doing.
Click on “Upload” and then upload all the files (as one zip file) which you downloaded from wordpress.org.
Before uploading, It is easier to extract all the files first and make a ZIP file again including files only as the top location instead of all the files inside a directory. That way it will extract all the files instead of creating one directory first and then extract the files in it.
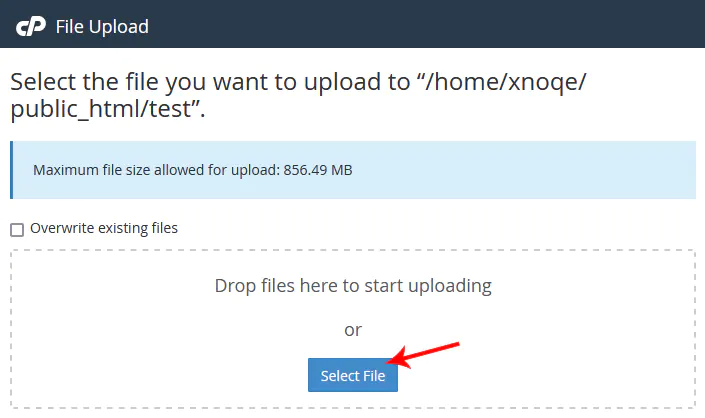
One the zip file is 100% uploaded, then go back to the directory we just uploaded a zip file to.
Now right-click on the zip file (wordpress.zip in our case) and choose extract. Then click on “Extract Files”. You can now right-click and delete the wordpress.zip file, which is no longer needed.
That’s it for uploading the files. Now browse your domain or subdirectory (xnoqe.com/test in our case) and proceed to complete the installation.
Step 4: Completing Installation
If everything went correctly, It will now begin the WordPress installation and will show you the first page to select language.
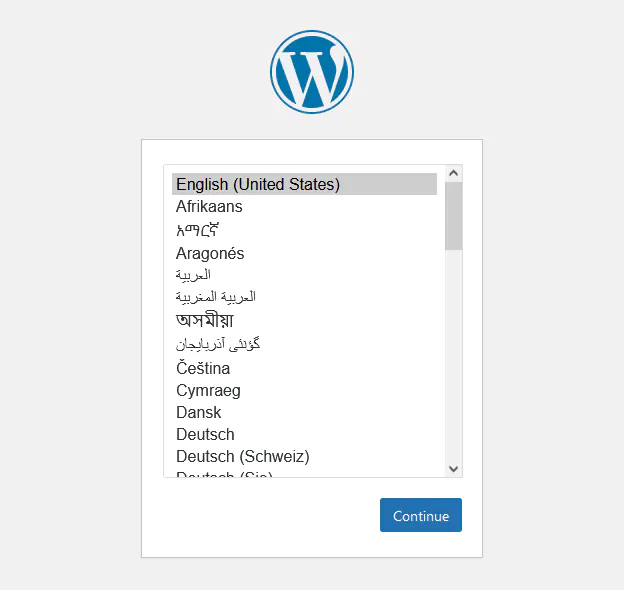
Select your desired language (English in our case) and click continue.
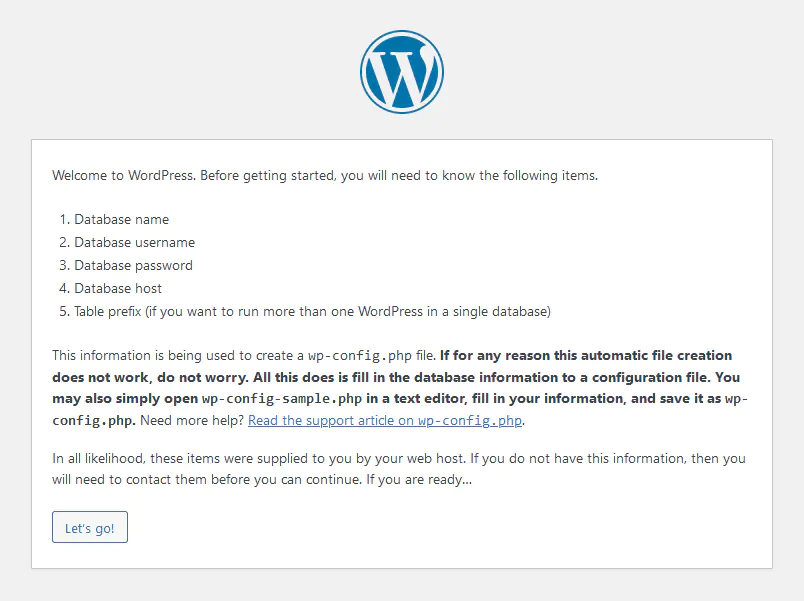
Now it will ask you to get the database name and user info which we created in the previous step before uploading files. Click “Let’s Go”
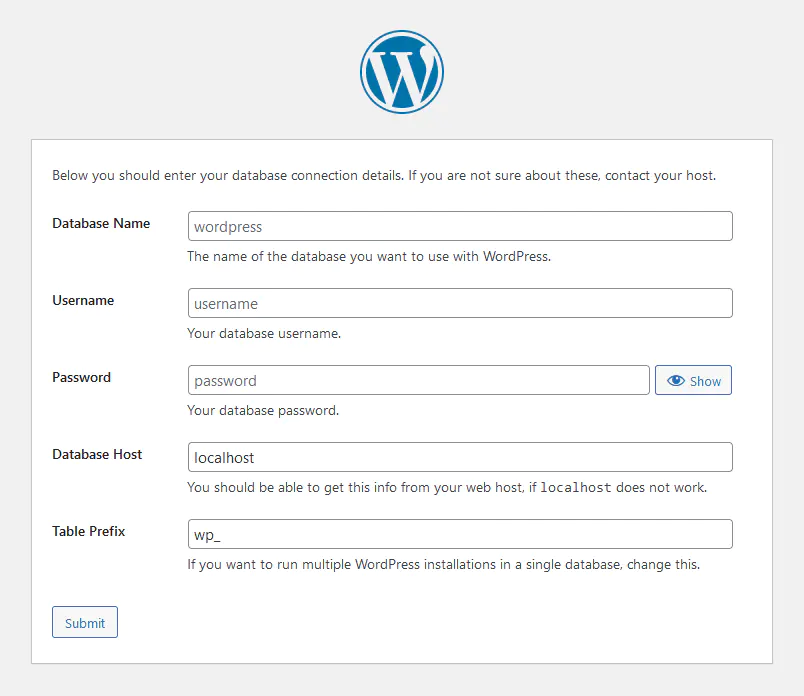
Now enter the datbase name, database user, and database user password. You can leave Database Host as “localhost” (unless your hosting company provided a any different host name. Then leave Table Prefix as “wp_” (unless you want to install multuple wordpress installations into a single databse due to any dataabse limits – not recommended though). Click Submit.
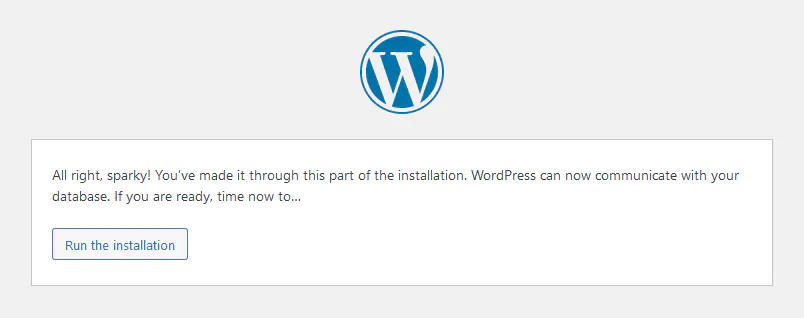
if all entered correctly, it will now show you that the installation is ready to proceed. Click “Run the instllation”.
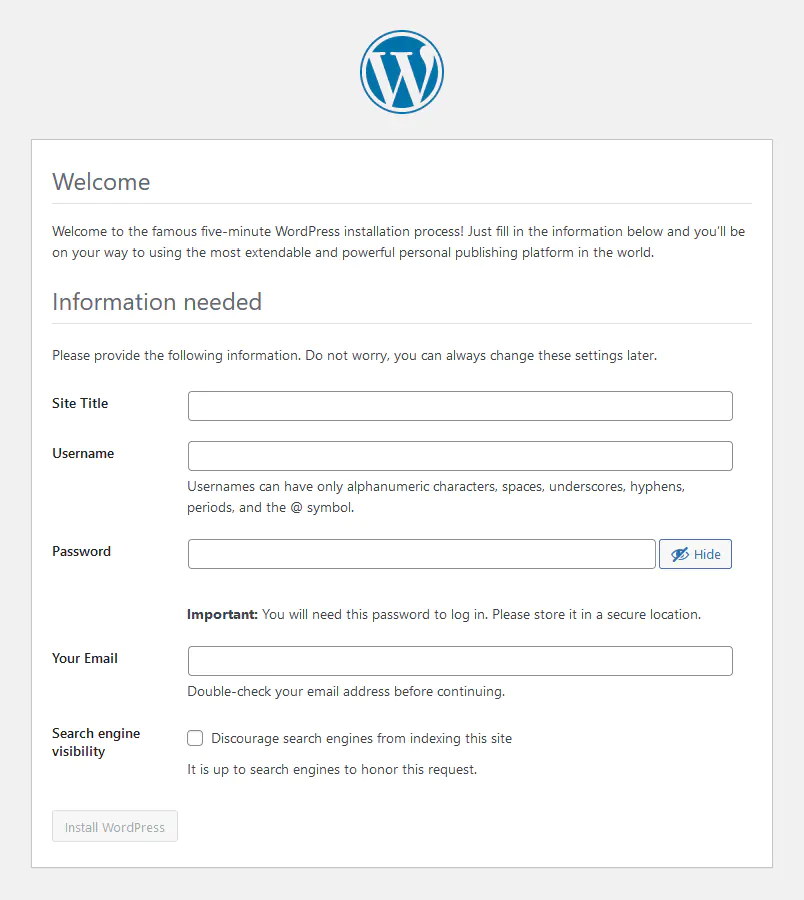
Now you will set your site title, username, password, and your email. These credentials will be used to loign to your admin area dashboard (wp-admin) of WordPress.
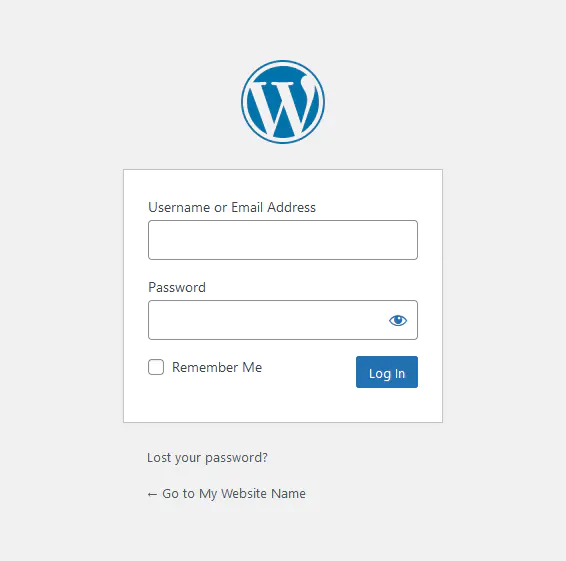
After entering all that it will ask you to login. Now you can click “login” and it will proceed you to your admin login page which you will be using everytime to access your WordPress admin area.
You an access your admin panel using the /wp-admin at the end of your domain or URL i.e yourwebsite.com/wp-admin
After login, you will be proceeded to the dasboard of your WordPress website. And we are done installing the WordPress.
That’s it for this tutorial, if don’t know what to do next then stay tuned for more WordPres tutorials. Don’t forget to check the main WordPress Category on our website and WordPress tag for more of such tutotials.
If you still have any querstions, or want to learn something else, please feel free to leave a comment below. Thanks for reading!